DALLAS
|
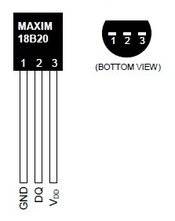
The one wire Digital Temperature Sensor (also known as DS18B20 or Maxim) is a great chip for measuring temperature in your projects. Luckily, there is a Dallas Temperature library for the arduino which makes using this sensor very easy. Circuit |
|
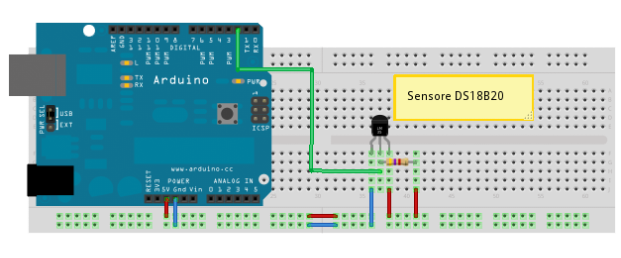
Connect three wires to the Arduino board. The first two, red and blue, connect to the two long horizontal rows on the side of the breadboard to provide access to the 5 volt supply and ground. The third wire (green) goes from digital pin 2 to the second leg of the Sensor. That same leg of the Sensor connects through a pull-down resistor (here 4,7 KOhms) to the 5 volt supply.
Here the functions used for this spesific Sensore will return the temperature value in °C.
Code
(The following code will print in the serial the temperature measured by the Sensor)
|
#include <OneWire.h>
#include <DallasTemperature.h> #define ONE_WIRE_BUS 2 OneWire oneWire(ONE_WIRE_BUS); DallasTemperature sensors(&oneWire); void setup(void) { int temp=0; Serial.begin(9600); sensors.begin(); } void loop(void) { sensors.requestTemperatures(); temp = sensors.getTempCByIndex(0) Serial.println(temp); } |
Data wire is plugged into pin 2 on the Arduino Setup a oneWire instance to communicate with any OneWire devices (not just Maxim/Dallas temperature ICs) Pass our oneWire reference to Dallas Temperature. start serial port Start up the library Call sensors.requestTemperatures() to issue a global temperature Send the command to get temperatures (0 refers to the first IC on the wire) Prints the temperature in Serial |
More information can be found here.
